6: Installing OSCAR on a Virtual Machine
[Original article by: KC Lai]
How to install OSCAR electronic medical records system as a Linux KVM virtual machine
[This is a part of a series on self-hosting OSCAR. Start by reading the first article.]
Prerequisites:
- Read: Hypervisor Host Server
- You have a server installed with Linux KVM
- You are using Virtual Machine Manager (virt-manager) to create and manage your Virtual Machines (you can also use command line, but its a lot harder)
- You have bridge networking enabled on your server
- You have downloaded the ISO file for Linux – Ubuntu Server and copied to your host server.
Step 1: Manage your Hypervisor Server
If you followed the previous instructions on setting up a baremetal hypervisor server with Linux KVM, you can now start to access your host server and create guest Virtual Machines (VM) of which OSCAR can be one of them.
You have different options on accessing your host server:
Option A: Directly on the server
If you have a monitor, keyboard and mouse directly attached to the server, you can log in to the server by typing in your username and password.
Then enter the XFCE graphical user interface:
$ startx
or
$ startxfce4
Start the Virtual Machine Manager by accessing it in the Menu -> System Tools -> Virtual Machine Manager
or by starting a terminal session and typing:
$ virt-manager &
Option B: SSH to your server
SSH is a protocol of securely accessing the server through an encrypted channel. It allows you to connect to the server from another computer or location.
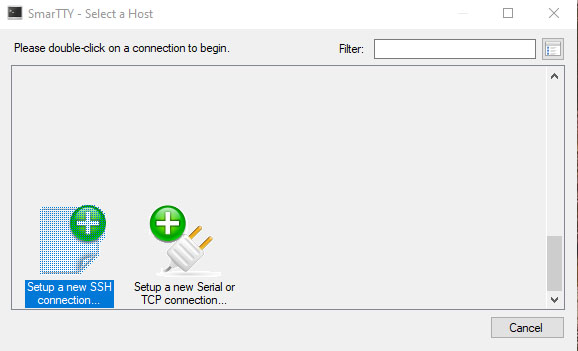
Use your favourite SSH program and ssh to the server IP. You can consider downloading and use SmarTTY.
Run the program and click on “Setup a new SSH Connection…”
Create a new connection profile:
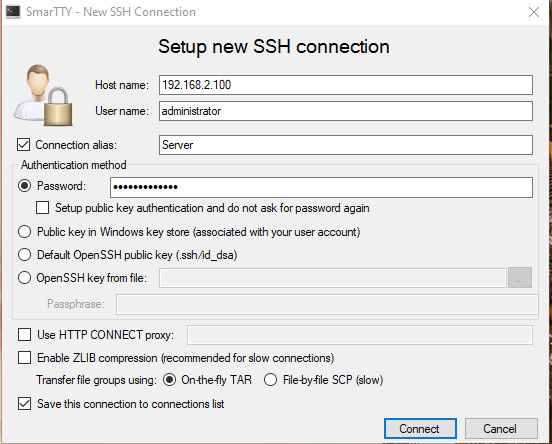
Change the IP Host Name, and server User name for what applies to your situation.Click “Connect” You should be connected to your server now. You can run Linux command lines or start the Virtual Machine Manager:
$ virt-manager &
Note: The “&” backgrounds the command (it runs the command in the background and lets your continue to work at the command line)
Copy the latest Ubuntu Server ISO to the host server
Download the latest Linux Ubuntu Server and copy it to your host server home directory ~/ such as “/home/administrator”.
If you are using SmarTTY, you can go to menu “SCP -> Upload a file”.
| Upload a File with SCP
Local file name: find the ISO file that you downloaded own your computer Remote directory: /home/administrator (* Or whatever your administrator username is) |
Click Upload.
* If you run in to problems and get error messages, it means you are trying to upload to a directory that your username does not have permissions to access. Please check that you are uploading to your home directory.
Step 2: Create a virtual disk
Once you have Virtual Machine Manager running, start by creating a virtual disk which you will install Linux server and then OSCAR.
Edit menu -> Connection Details -> Storage tab
Click on “New Volume”.
Name the virtual disk file whatever you want “oscar-server.img”.
Choose Format: qcow2
Max Capacity: 50 GB (or any size you want)
Allocation: 50 GB
Click “Finish”
* Choosing qcow2 format allows you to expand the virtual disk later when you run out of room.
Step 3: Create a virtual machine
Inside Virtual Machine Manager, click on the icon “New”.
Give a name to your virtual machine, ie. “OSCAR”
Choose “Local install media (ISO image or CDROM)”.
Click Forward.
Choose “Use ISO image” and browse to find the ISO image of Linux Ubuntu Server.
Choose OS Type “Linux” (Find the closest version that matches, otherwise choose the highest Ubuntu version shown)
Click Forward.
Enter an amount of Memory: 2000 MB (or more if you like)
Enter how many CPU you want to assign to this VM: 2
Click Forward.
Select “Select managed or other existing storage”, click Browse and select your previously created virtual disk “oscar-server.img”, click “Choose Volume”
Click Forward.
You may adjust the setting before booting up the virtual machine by checkmark enable “Customize configuration before install”.
Click the “Advanced Options” arrow to thos the ethernet device to use. Choose the bridge network that you created previously, or use “Specify shared device name” and type in the name of the bridge network that you created previously, ie. Bridge name: br0
* Write down the MAC address of this virtual network interface. You should create a fixed IP address attached to this MAC address on your router, so you can know where to access your OSCAR server later.
Click Finish.
If you entered “Customize configuration before install” you can make some final changes and then click the icon ‘Install”.
The virtual machine server should show a window and start the Linux Ubuntu install process. Go through he same process (as explained in a previous post on installing Linux) and install a basic Linux server.
Some considerations when installing this Linux server for OSCAR:
- Consider using full disk encryption using LVM-LUKS. This protects your OSCAR virtual disk data in case someone steals the server.
- However, if you choose to encrypt the whole disk, you will need to be able to access the server console directly (or via SSH and the graphical Xming server) to type in the administrator password before you can boot up the OSCAR server. This may be an issue, if you experience power outages and the server restarts. Or if you shut down the server on purpose for maintenance, you will need to remember to check if OSCAR virtual machine is running and if the administrator password was typed in to continue the boot up sequence.
- It will also be complicated if you run out of space and you want to expand the qcow2 disk that holds the encrypted LVM-LUKS system. If you used just a simple qcow2 disk, it is easier to expand the virtual disk, if you run out of space.
Step 4: Install OSCAR deb
Now that you have installed a bare Linux server with Ubuntu server in a virtual machine, you can now follow Peter HC’s instructions and install the latest OSCAR deb.
Download the latest OSCAR deb to the OSCAR virtual machine, and install OSCAR via his instructions:
Instructions on installing OSCAR 19